Thursday, October 10, 2013

DO SOMETHING WITH THOSE EXTRA JARS DIY

Mason jar DIY are all the hype these days.  And they should be because they are so cute.  However, any glass bottle, any shape, can be a totally cute and modern DIY as well.  I make a lot of spaghetti, and thought one day that I should keep the jars for something.  Even when my son started eating Gerber foods, I also thought, I should keep these things.  My sister even stole a glass Sprite bottle from a Mexican restaurant here (she didn’t know you couldn’t take them) and I was so excited because I thought I could totally use this for something. Well ladies, I took some ideas I saw on Pinterest and put the them together. 

These are DSWTEJ DIY: (do something with those extra jars do it yourself)


Okay they ARE as easy as they look which makes this DIY even more awesome.

You’ll need:


  • Clean, empty jars of all shapes, or the same.  Your call.
  • Thread.  You can use yarn too.
  • Spray paint (I chose gold)
  • Clear/clearish nailpolish (not pictured)

Step 1.
Spray the inside of the jar.


Step 2.
Spray the outside.  Don’t get too close or you’ll have very runny wet paint instead of a spray paint. (I did this to achieve a more gold look, you don’t have to)


This is not a step.  It’s a tip.  If you don’t want gold tipped fingers, wear gloves.


Step 3. 
Paint them all.  As many coats of paint as you’d like.  When satisfied, wait for them to be completely dry. 


Step 4. 
Choose your colors!


Step 5.
I found it incredibly easy to use clear nail polish (ok mine has a bit of glitter) to stick the thread where I wanted. Wait for it to dry a bit, and wrap wrap wrap!


Step 6.
Keep wrapping & ignore my face in the photo

You can wrap however you want. You can do half, the whole thing, orrr whatever.  I did stripes.


This one I did half only.


If you want to add more flavor to your jars, I put some teal in the middle of the pink on this jar.


And now I did something with the jars that is really tasteful and cute and modern!  You can put flowers, sticks, or bamboo like I did.  So next time you make spaghetti or are done feeding your baby that Gerber food, keep them, and do this to them!

From your one and only,
Rozslin


Wednesday, October 9, 2013

CHICKEN TINGA CHIMICHANGAS


Hello everyone! Today I'm giving a food recipe. Im pretty nervous because Samantha usually does this section and she is an amazing cook. 
So I decided tostay away from hard recipes (haha) and give you my Tex Mex favorite super easy chimichanga recipe.

INGREDIENTS:
6 flour tortillas
1 can of refried beans
500gms shredded chicken
1/2 onion
4 red tomatoes
3 - 4 chipotles
sour cream 
lettuce
cooking oil

STEPS:
First, you make the Chicken Tinga which is super easy all you have to do is cut half an onion in slices and fry it in one tbs of cooking oil. Mean while put in the blender the tomatoes and chipotles and blend them. Then put the shredded chicken with the onions and pour over the sauce and let it cook for 10 mins. Thats its for the chicken. This is how it should look: (add salt if necessary).


Now for the actual chimichanga take a flower tortilla and smudge the refried beens right in the middle of it. Like this:


Then put the chicken tinga over the beens


Then fold the sides like this:


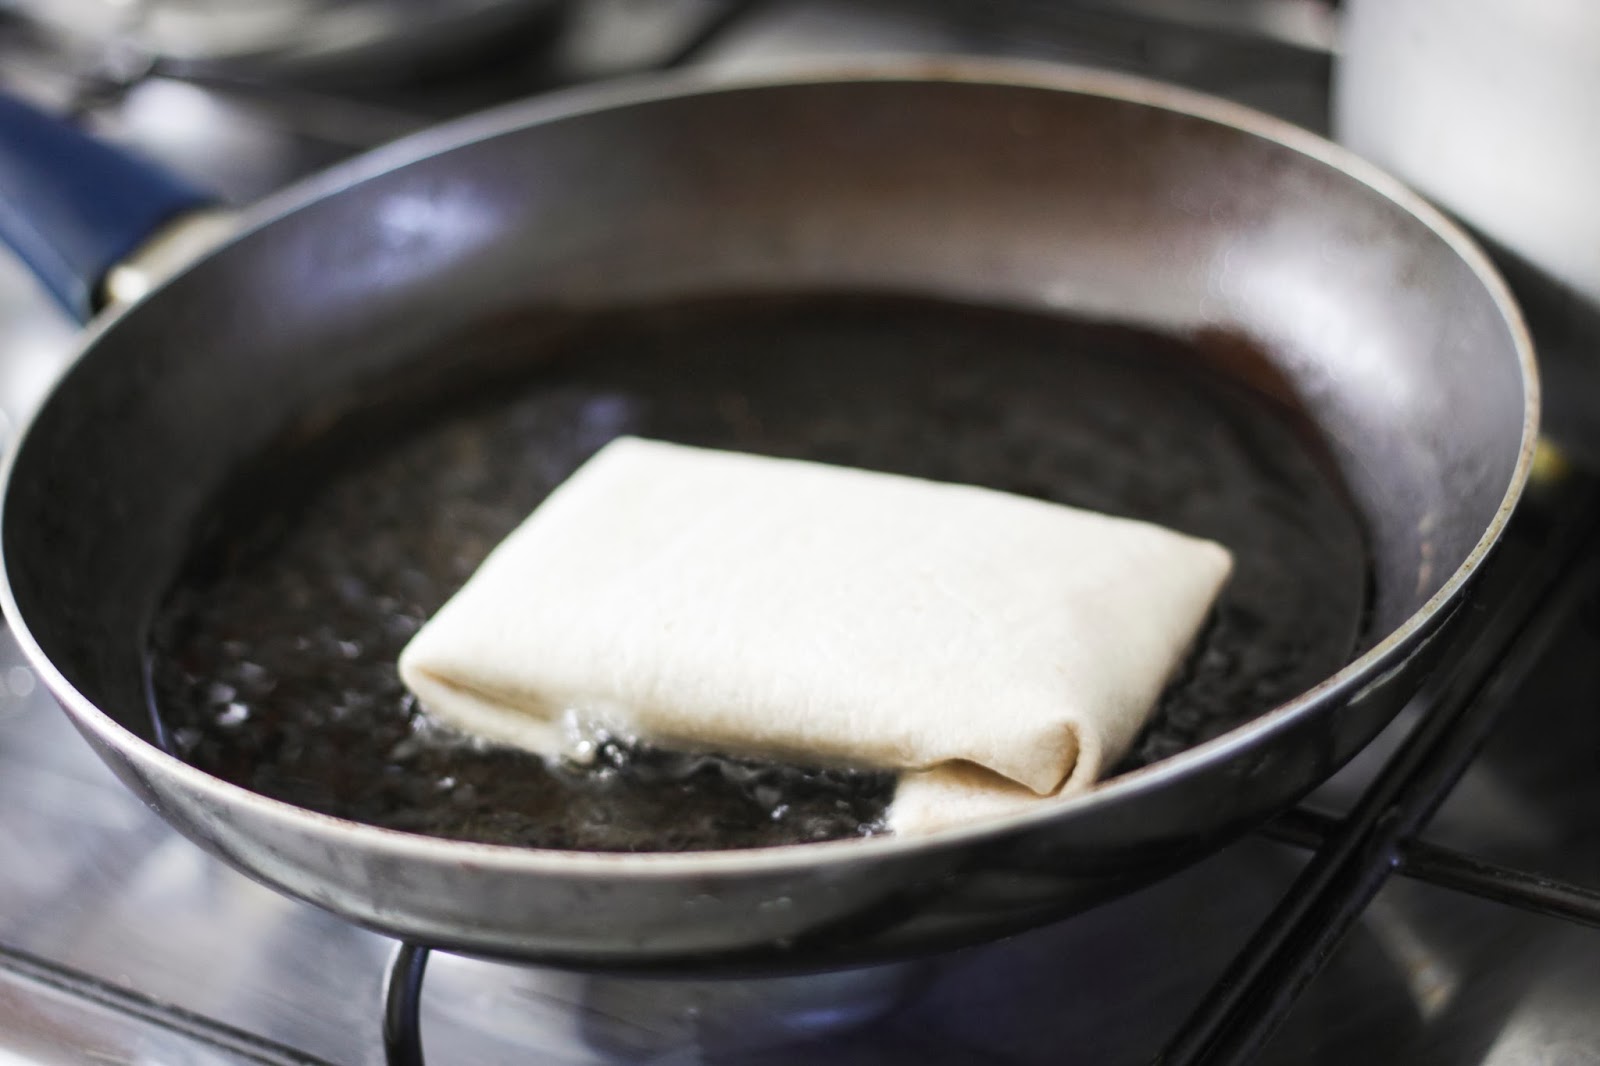
And it should have a rectangular shape. Then I take the side that is left with the corners and with both my hands I place it downwards on the saucepan (saucepan should half plenty cooking oil to fry the chimichanga)
NOTE: Do not place chimichanga until the cooking oil is hot! If you do it before the tortilla will absorb all the oil.

Let if fry just 1 min or until brown on each side


Then place in a plate with paper towels to get rid of the excess oil.


Top it off with some sour cream that will melt over it. YUMY! and I like to garnish it with some veggies and rice. 


I hope you guys enjoyed my recipe. See ya next time :D

Love and Kisses,
Denise


Tuesday, October 8, 2013

HOW TO GET LONGER LOOKING LASHES


Hi everyone! Today I’m going to share with you one of my most precious beauty tricks: How to make it look like you have awesomely long lashes ;)
Here are our basic tools:
·        Water-proof mascara
·        Non water-proof mascara
·        A teaspoon
·        Your everyday lash curler

NOTE: I recommend that one of the two mascaras has a really thick brush; this will make a huge difference with volume.


First of all, you’re going to curl your lashes the old-fashioned way: with a spoon. If you’ve never used a spoon as a curler, just grab it upside-down in a fist, with your thumb on the edge and pull them lightly and carefully as if you were brushing them. In the video it might seem like a vicious attack against my lashes but in reality I’m being very gentle LOL. Here’s the demonstration:


Once your lashes are spoon-curled enough to make a soft curve on your lash-line, it’s time for the eyelash curler. The trick when using this glorious invention is to try to get as close to the roots of your lashes as you possibly can and then press gently, pulsating about 8 times. You can work your way up to the tips with each pulse to make them curlier but you need to be careful because if you overdo that then the lashes will curl in on themselves and ruin your day (at least it would mine haha!)

       Now, get that thick brush mascara out and apply the first coat, focusing on the lash-line (roots) to keep them up. An important tip here is to move the brush horizontally through the lashes as you make your way up. This will keep the mascara from leaving clumps and it will distribute evenly.


This is how it looks after one coat:


Now, for the second coat, use the non water-proof mascara, applying the same way as the first coat.

Ok, so for the final coat, go back to the water-proof mascara and give it one more go, but this time focusing on the tips and the corner lashes to elongate and widen the eye. Use the tip of the brush for this part. See the difference?


END RESULT:


NOW FOR THE BOTTOM LASHES:
 I love to use Volume Million Lashes by L’Oreal for my bottom lashes because they are a lot smaller and not as full and the brush is perfect. I recommend you try it J


      Apply one coat first, wait a few second for it to dry, and then apply the second, again using the tip to separate and elongate. Add a little extra on the outer corners as well.


AND VOILÁ! FINAL RESULT: LONGER LASHES EFFECT


If you put this next to the first picture, you never would’ve guessed this could be done right? All you need is to know and apply the right tips and tricks to give your lashes a little volume.
Hope you try this and get awesome results!

Lots of love and yours truly,
Sam


Monday, October 7, 2013

BE INSPIRED BY YOUR OWN LIFE


This weekend was especially inspiring for me. For those of our followers who are not LDS, we had a General Conference for all the members of The Church around the world where we were able to listen to inspiring words and teachings from our leaders.

As a result, I’ve felt inspired to see the small and simple things in my life that bring me joy. I think it’s a good exercise for everyone to stop and think about all that is good in your life. In other words:

Learn to appreciate every gift you have been given in life. Sometimes the small things seem so common that we focus completely on the big things. Truth is, sometimes a day won’t hold any spectacular occurrences or great manifestations. So focus on the small things that you would usually take for granted any other day: waking up to a sunny day, someone making you laugh or smile, a phone call from your mom just wondering how your day’s been…
Once you’ve listed as many blessings as you can possibly think of, there is one more thing to do: Be grateful.


It seems like it’s easier said than done because in real life, how many times do we actually stop and take a moment to appreciate all the good things in our life. In the past week, how many times did you “Stop and smell the roses”? Figuratively or literally, how many times?
Most of us find ourselves dazed by our daily routines or too tired, disappointed, annoyed or upset to even TRY to change our day and our mood. Here’s something I learned this weekend that will definitely help on such a day:


Finally, my last advice on letting our own life be an inspiration to us is simple:

Why? Because you can. And because it is a scientific fact that forcing yourself to smile will put you in a better mood.
So there it is. Let yourself be inspired by yourself and by your own unique, special and extraordinary life.

Until next time!

Lots of love, a BIG SMILE, and yours truly,
Sam


Friday, October 4, 2013

DENIM AND FLOWERS


DENIM ROXY SHIRT - SPORTS CHALET
FLOWER LEGGINGS - TODA MODA
BROWN BOOTS - CHARLOT RUSSE
NECKLACE - DHENNI ACCESORIO

Thursday, October 3, 2013

FLOWER PAPER LANTERN


I've wanted to create this flower lantern forever! I think it's so pretty, cheap and easy to do, it's just a perfect DIY proyect for home decor. 
You obviously dont have to use these colors, you can find almost any color of paper lantern and just add you favorite color of flowers.

All you need is:
Paper lantern
Flowers
Scissors
Glue


1. Cut the stem off so you are only left with the rose (I used different size flowers to add dimension)


2. Add glue to the base of the flower and glue it to the lantern.
3. Make sure that the design you create is the same on both sides of the lamp cause if not it wont balance right when you hang it.

And thats pretty much it, it only took me like 1 hr to do it all.


Ithink this would even be cute for a baby shower or wedding. Hope you enjoyed this DIY

Love and kisses,
Denise