Friday, October 4, 2013

DENIM AND FLOWERS


DENIM ROXY SHIRT - SPORTS CHALET
FLOWER LEGGINGS - TODA MODA
BROWN BOOTS - CHARLOT RUSSE
NECKLACE - DHENNI ACCESORIO

Thursday, October 3, 2013

FLOWER PAPER LANTERN


I've wanted to create this flower lantern forever! I think it's so pretty, cheap and easy to do, it's just a perfect DIY proyect for home decor. 
You obviously dont have to use these colors, you can find almost any color of paper lantern and just add you favorite color of flowers.

All you need is:
Paper lantern
Flowers
Scissors
Glue


1. Cut the stem off so you are only left with the rose (I used different size flowers to add dimension)


2. Add glue to the base of the flower and glue it to the lantern.
3. Make sure that the design you create is the same on both sides of the lamp cause if not it wont balance right when you hang it.

And thats pretty much it, it only took me like 1 hr to do it all.


Ithink this would even be cute for a baby shower or wedding. Hope you enjoyed this DIY

Love and kisses,
Denise


Wednesday, October 2, 2013

Mushroom, Corn & Cheese Chiles Rellenos


So this week we’re going very traditional Mexican again, hope you don’t mind J but chiles rellenos are one of my favorite dishes and if you haven’t had them before then now’s a good time to try something new and delicious.


Ingredients:
8 large poblano chiles
2 cups shredded cheese (any kind you like)
1 can of mushrooms ( drained, and you can use fresh mushrooms as well)
1 cup of corn (drained from a can)
½ onion, chopped
1 cup sour cream (Or more if you really like sour cream J)
Toothpicks

For the Bean sauce:
2 cups beans (I used a can this time but homemade are even better, don’t drain them)
3 tomatoes
Salt & Pepper
1 tbsp chicken broth powder

STEPS:

1.     Ok so you start by filling your house with the most GLORIOUS aroma of poblano chiles being toasted directly on the stove top. Seriously, I’m not kidding, if they had air freshener that smelled like this…. You’ll see what I mean once you start toasting those babies.


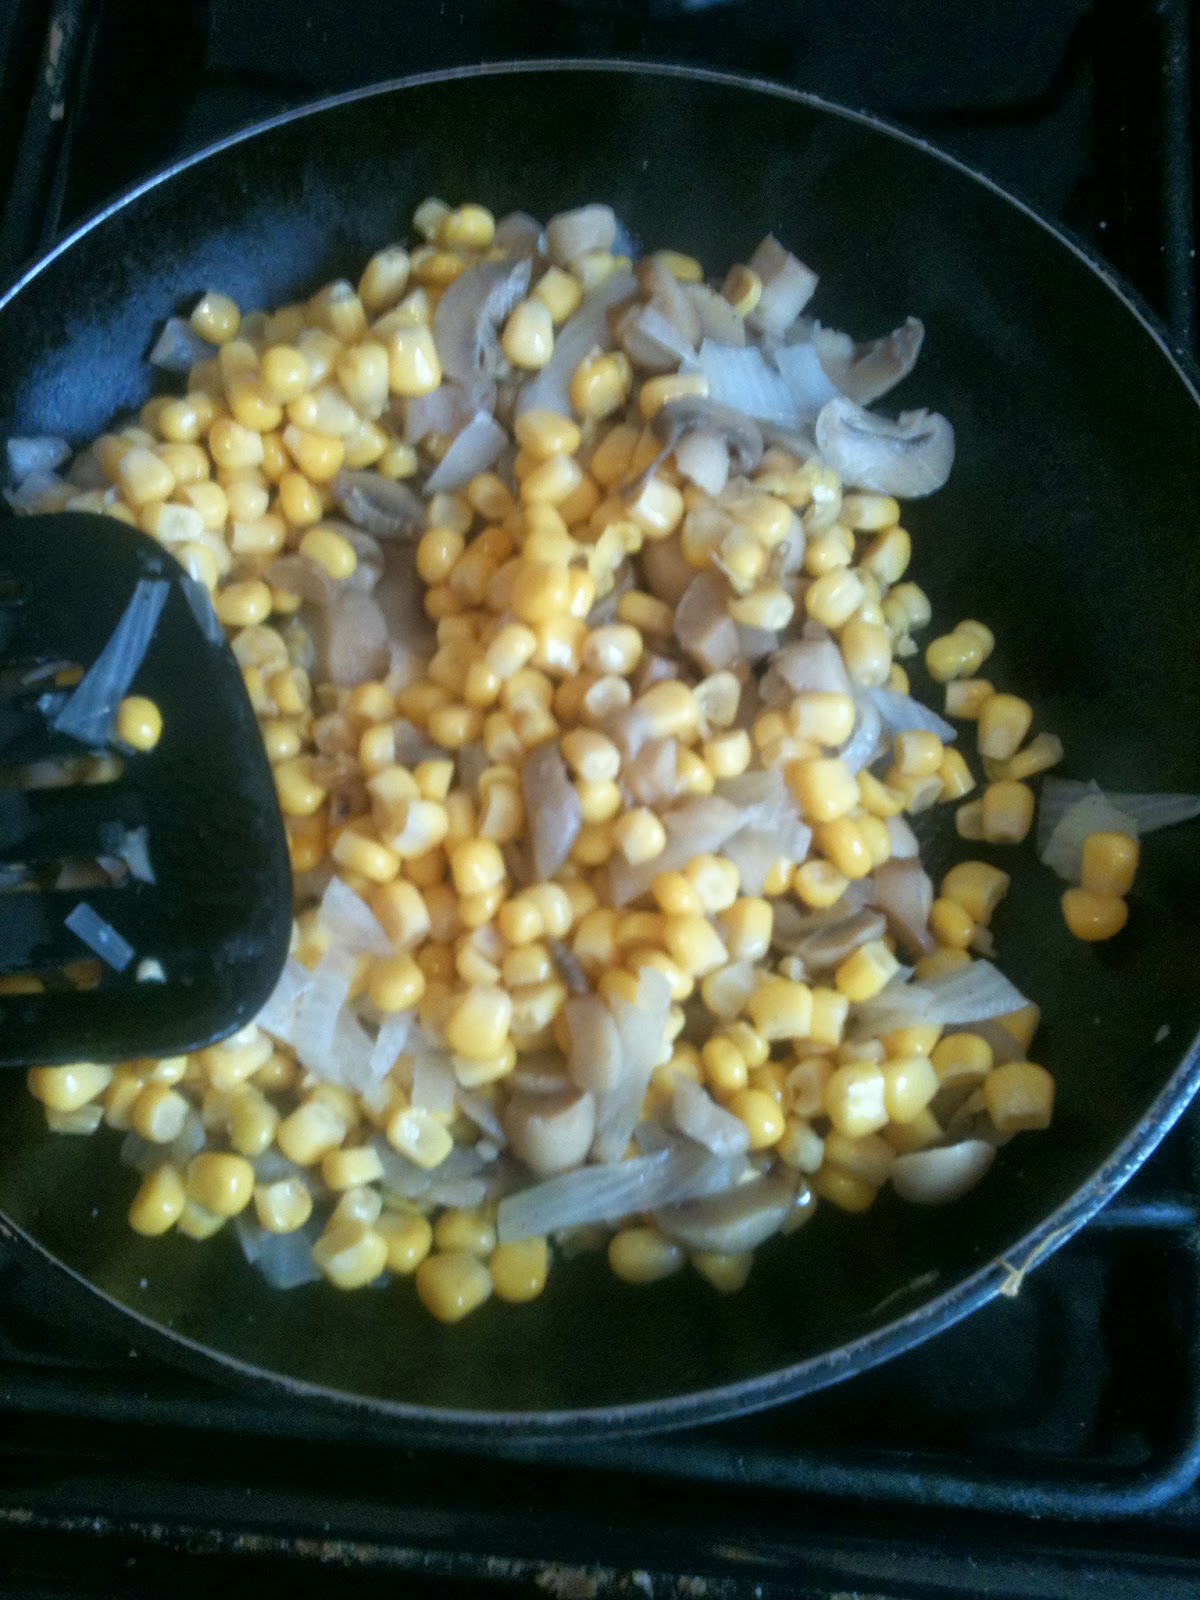
2.       Sauté the onions until clear, add a pinch of salt and pepper for flavor.


3.       Add the mushrooms and the corn and cook for about three minutes.


4.       Remove mixture from heat and add shredded cheese in separate container. Mix well.

5.       Meanwhile, keep turning those chiles until they’re toasted all around, they’ll look burnt but that’s ok because that top layer will be peeled off later on. Start putting the ones that are ready in a plastic bag and close it, this way the heat will create a little chili saunu in there and they will be easier to peel.


6.       Once they’re all ready to be peeled, take them out of the bag and start peeling in the sink them with the help of cold running water. The skin will come right off.

7.       Now make a cut right along the length of the chili so you can devein and take the seeds out.  CAUTION: I DEEPLY RECOMMEND WEARING LATEX GLOVES FOR THIS PART IF YOU SUSPECT THAT SOME OF THOSE CHILIS ARE PRETTY HOT. YOUR HANDS MAY FEEL LIKE YOU TRIED TO HOLD FIRE IN THEM IF YOU’RE NOT CAREFUL. TRUST ME, I SPEAK FROM EXPERIENCE, IT HURTS, WEAR THE GLOVES.

8.       Once they’ve all been cleaned, align them in a greased pan and fill each one generously with the cheese and mushroom mixture. Seal with toothpicks.


9.       In the blender, puree the beans and tomatoes. Add the chicken broth powder and salt and pepper to taste.

10.       Add bean sauce on top of the chiles and cover them well. 

11.       Top each chile with a spoonful of sour cream and pop those babies in the oven.


12.       Cook for 20-30 minutes.

13.       Garnish with rice :) aaaaand VOILÁ! CÉST TOUT!


Enjoy!
See you next time.
Lots of love and yours truly,
Sam


Tuesday, October 1, 2013

BRONZER IS OUR FRIEND

HH&H’s beauty post of this week will be about, one of my dearest treasures: Bronzer.

Bronzer is not our enemy, it is our friend!  When properly used, of course.  I am going to give a few tips on how we can look like this:


A beautiful natural looking bronzed face, instead of this:


Contouring has a lot to do with it.  Because it helps make your face makeup look as natural as possible, instead of looking like a pumpkin, orange smurf, or like your face fell into a big puddle of Nutella, as seen in above photo. 


On Pinterest, we have access to so many wonderful tips & tutorials about how to properly apply all of your makeup like a pro.  This is one that I personally found most helpful when it comes to bronzer. It is just a picture, but shows exactly where you are supposed to put bronzer. 

  1. Put your bronzer where the sun would hit your face. 
  2. The most important places to put it are the rim of your forehead, and your cheekbones.
  3. Blend your bronzer into your neck as well so that it doesn’t look like your face is a different color than the rest of your body.
  4. Apply with moderation.  It doesn’t take much bronzer to make a difference.
  5. Do not apply bronzer to your entire face.  Because then you risk putting too much on and then looking like the Nutella girl.

It really is simple, and with a couple of tries I’m sure you could find out what looks best on you, and your skin type.  If you’re not into the whole contouring thing, or don’t like to put a lot of make up on your face, my tip would to be to apply a bit of bronzer to your cheekbones, and see what a big difference a little bronzer can make.  Remember, you’re beautiful just the way you are, but also remember that a little bronzer can go a long way and can help you achieve that perfect sun kissed skin look.

From your one&only,
Rozslin


Monday, September 30, 2013

EXPRESS YOURSELF


Since I was a little girl, fashion has been a way of expressing myself, allowing me to cultivate a different part of my personality at any moment. I use it as the physical manifestation and illumination of my inner feelings--a wearable art. That's why I look forward to my time in front of the closet!


"Why fit in when you were born to stand out?" - DR. SEUSS

Sometimes its hard to find the right way of doing it and staying true to your own style so here are some things I find helpful when I dress and how I treat my clothes:

1. Remember that style results from what you can create, not what you can purchase.
2. Dress for your mood. (No black on a bad day.)
3. Step out of your comfort zone.
4. When buying something new, look for durable,and high quality. (It might be pricier but It will last longer.)
5. Hang up clothes immediately after wear to reduce the need to wash and iron.
6. Break fashion rules. (Just not these.)

Fashion can be used to transform energy and break barriers. It starts conversation, affects morale, and connects cultures. Sure, they're just clothes! But we live our crazy, and magical lives in them.

So...respect your clothes and respect yourself. And let your beautiful light shine!


Love and kisses
Denise

Friday, September 27, 2013

AUTUMN COLORS


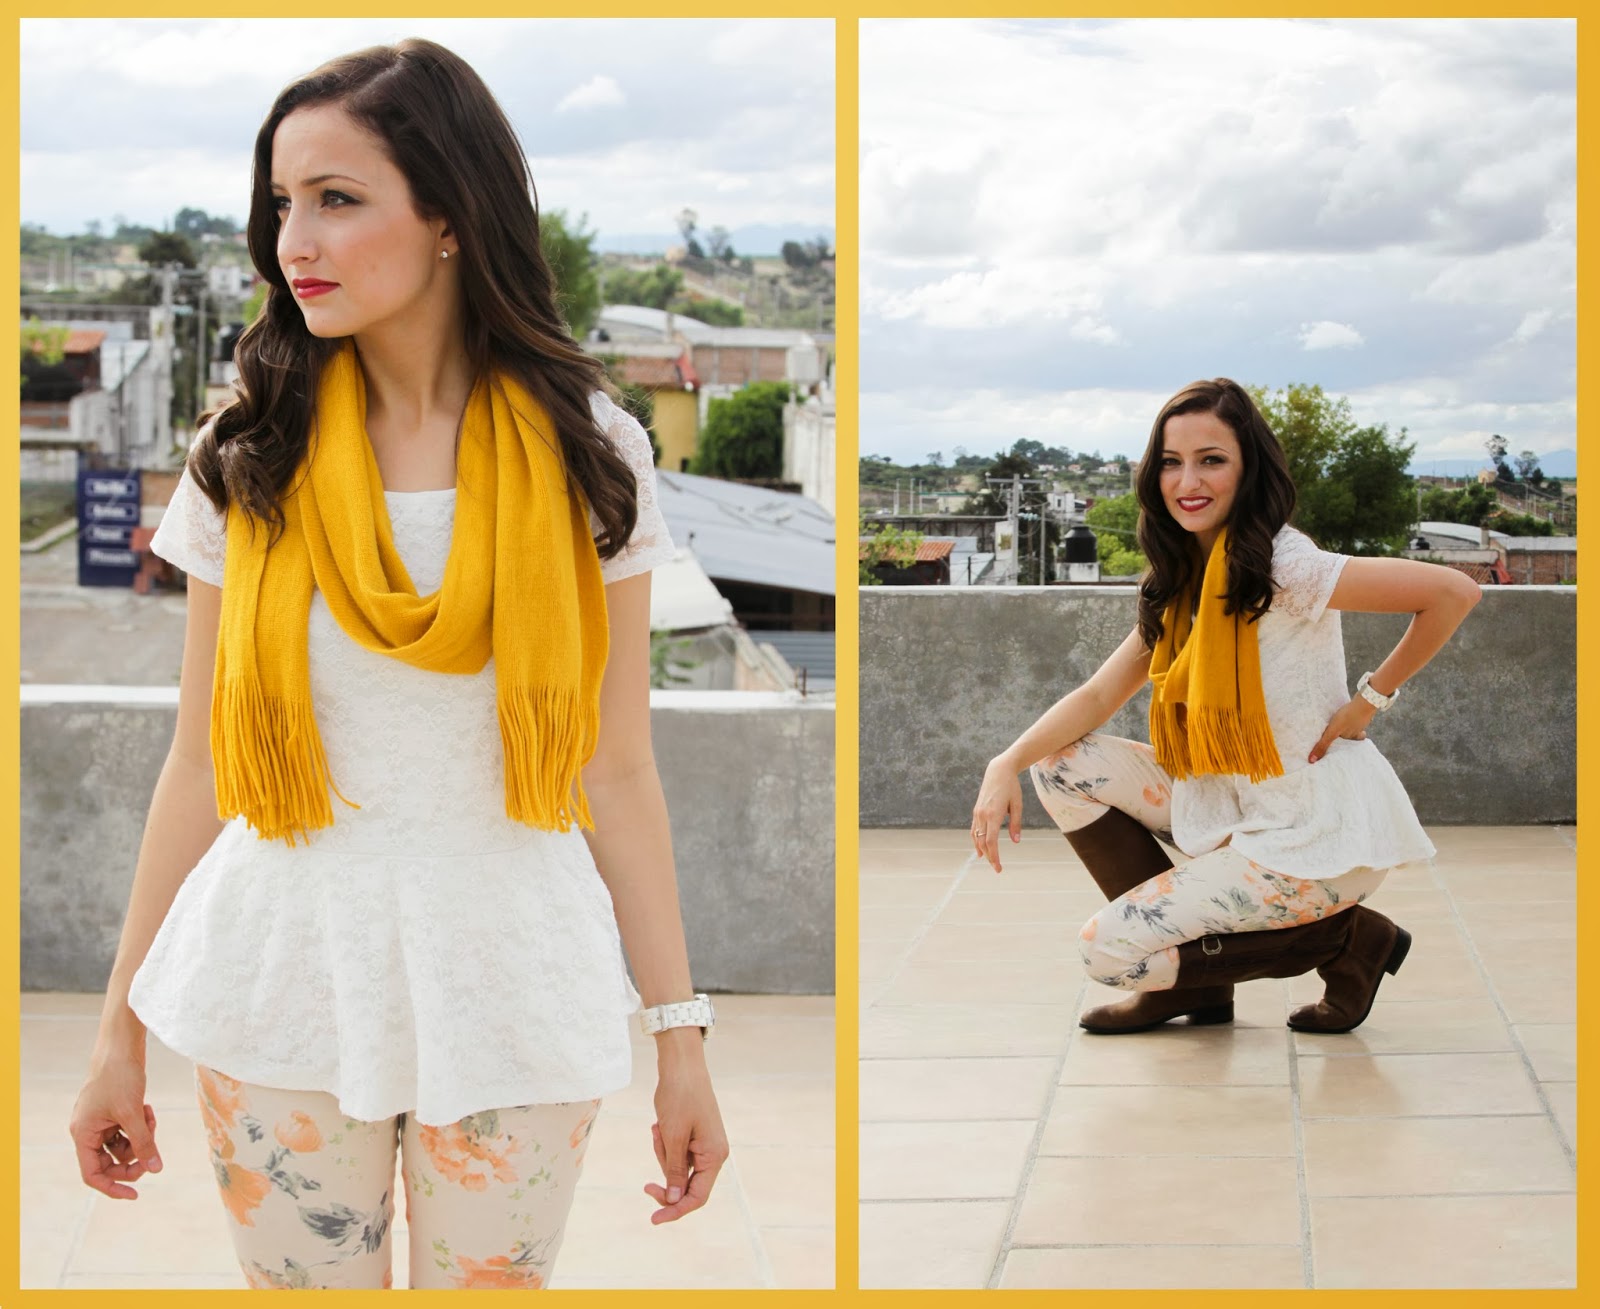
White lace top - ROSS STORE
Floral pants - RHAPSODIELLE
Brown Leather Boots - TODS
White Watch - WAL-MART
Scarf - TARGET

Thursday, September 26, 2013

DIY: I JUST NEED A MORE INTERESTING PAIR OF JEANS IN MY WARDROBE

When you are on a budget like me, sometimes you can’t freshen up your wardrobe with the latest and greatest fashion trends or the cutest pants you’ve ever seen on Pinterest.  Sad, right? No, not that sad!  You can take some of your older, more boring pair of jeans and make them a cute new pair of jeans with this easy DIY.

This is my DIY called “I just need a more interesting pair of jeans in my wardrobe.”

Ok so all you need is:


  1. A pair of jeans.  They can be any color.
  2. Acrylic paint.  Also can be any color of your choice.
  3. Paint brush/sponge.  I’m a paintbrush kinda gal, so I used a paintbrush.
  4. A plate to put your paint.
  5. A cup of water.
  6. A stencil.  You can buy it, or you can make it.
All you need to do is:

  1. Get your stencil ready.  I cut mine out of a thin cardboard.  (You’ll want something harder than a regular sheet of paper, and thinner than regular cardboard) Fold it in half and cut a shape of a heart out. 
2. Place it on your pants, hold it down so that none of the edges lift up, and dab dab dab.  Don’t put a lot of paint on your brush, or it will leak through and create blob rather than a heart.  You don’t need much paint at all.  And you don’t need to mix any water with your paint either. 


3. To make sure that you have an even space between hearts, put the left side of your stencil where you put your last heart.  Like this:


4. Paint one row, then move down and put the top part of your stencil under 2 painted hearts.  Your next heart should be in the middle of the top two hearts.  


5. Keep repeating this process, until you have covered your jeans with hearts!

It is that easy! 
Acrylic dries really quickly, but before painting another side, make sure your hearts have dried completely. 

Done!


Much better, right?

The best part about this DIY, aside from being super easy, is that there are many possibilities to painting your pants.  You can use any shape.  A bird, dog, lightning bolt (for all you Harry Potter lovers out there), polka dots, etc… 


You can paint on any color jean, with any color paint. You can paint your little girls leggings, or your son’s shorts. The sky is the limit on this DIY.  So ladies, get painting!

From your one & only,
  Rozslin